
This blog currently runs on Amazon Lightsail. Details of how I set it up and migrated content from my previous provider can be found in this earlier blog post – https://www.adrianmilne.com/migrating-wordpress-blog-amazon-aws-lightsail/.
Up until now, it has only been available on a standard unsecured HTTP connection. However, Google is increasingly encouraging sites to adopt HTTPS support on websites – calling for ‘HTTPS everywhere’ at a Google I/O event as far back at 2014. Chrome recently began reporting connections to non HTTPS sites as ‘Not Secure’. It seemed about time I looked into adding HTTPS to this site.
Ideally, I would like to keep it all inside the AWS ecosystem. You can generate certs using AWS, but at the time of writing – it looked like in order to use these effectively you would need a load balancer in front of Lightsail. This is a bit overkill for my humble site – so I had a look into alternative options.
I found an excellent article here on the AWS blog – https://lightsail.aws.amazon.com/ls/docs/en_us/articles/amazon-lightsail-using-lets-encrypt-certificates-with-wordpress. This article basically just follows the steps outlined there, with a couple of minor tweaks, additional explanations.
Let’s Encrypt seems to be the Certificate Authority of choice for free SLL certificates. This can be used in conjunction with Certbot to ‘relatively’ easily install Let’s Encrypt certs on Apache. Let’s look at how to do this in LightSail. The basic process will be to install certbot, generate the certificates and then update Apache & WordPress.
Installing Certbot on AWS
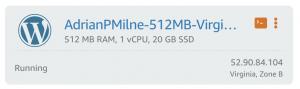
First find your instance in the Lightsail console.
Then click on the small orange terminal icon to open a terminal window. We will do most of the setup and configuration here.
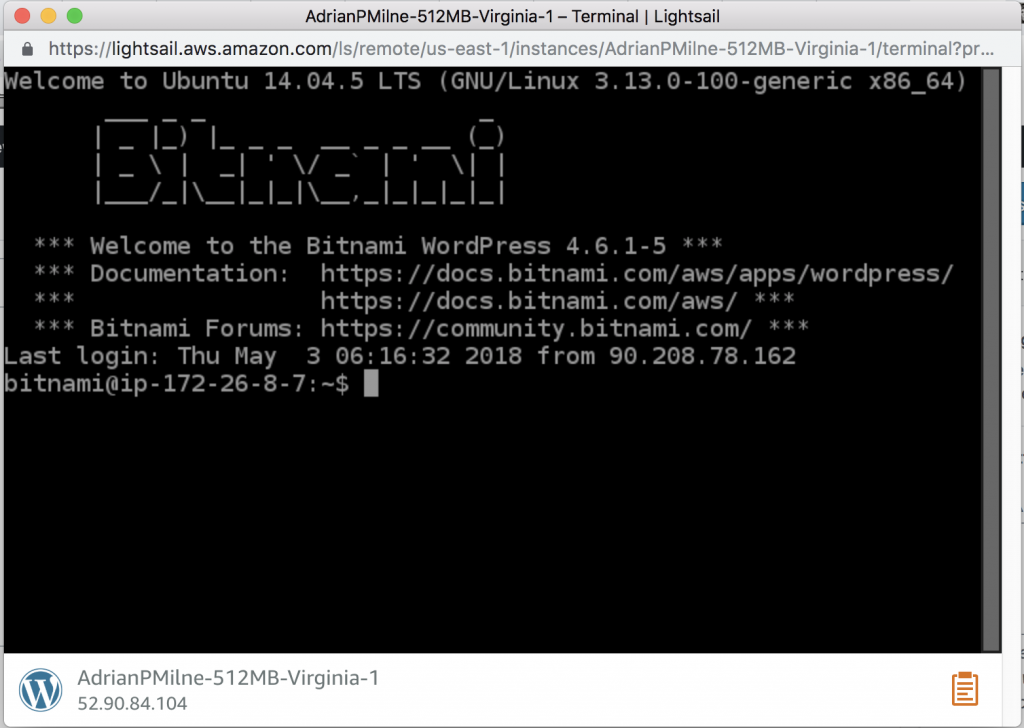
In this window we are now going to type in all the commands below. You can copy and paste (however – you need to copy here – then click on the yellow clipboard icon in the bottom right of the terminal window and paste into there. You can then right click in the terminal to paste the text there.
Another option is to create a script file to automate this. I may look at doing this next – as I need to repeat this process for a number of sites (and then update the certificates on a regular basis). However, for now – I just entered the commands below, one at a time into the terminal window.
sudo apt-get update
sudo apt-get install software-properties-common
sudo apt-add-repository ppa:certbot/certbot -y
sudo apt-get update -y
sudo apt-get install certbot -y
Generate a Certificate
DOMAIN=adrianmilne.com
WILDCARD=*.$DOMAIN
echo $DOMAIN && echo $WILDCARD
sudo certbot -d $DOMAIN -d $WILDCARD --manual --preferred-challenges dns certonly
This last command will prompt you to answer a series of questions before your certificate is :
‘Enter email address (used for urgent renewal and security notices):’
Read & Agree to Terms of Service…. (A)gree/(C)ancel:
Would you be willing to share your email address… (Y)es/(N)o
Are you OK with your IP being logged? (Y)es/(N)o – Note: You must answer ‘Y’ to this one
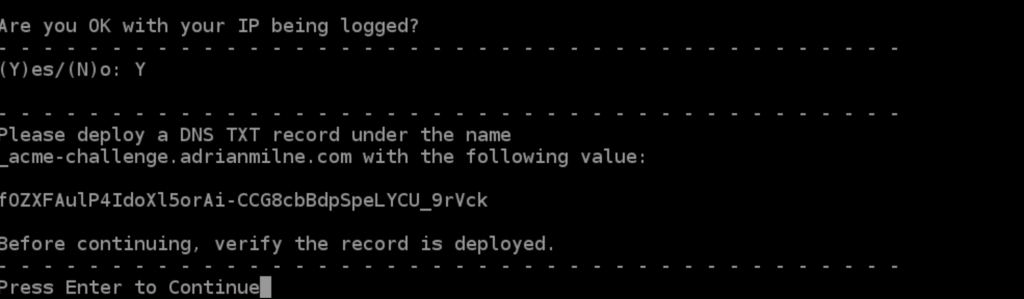
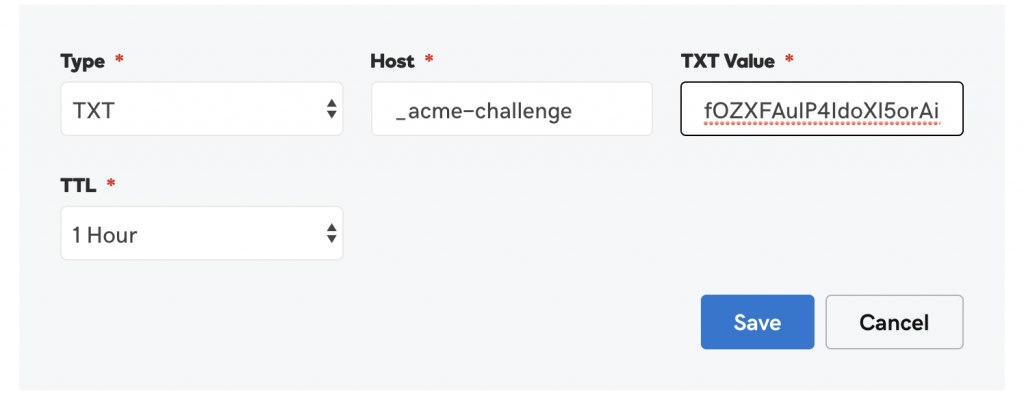
At this point – you need to copy the name and value displayed and create a matching DNS TXT record. In this case, mine are:
_acme-challenge.adrianmilne.com
fOZXFAulP4IdoXl5orAi-CCG8cbBdpSpeLYCU_9rVck
My DNS is currently hosted at Godaddy – so I just need to go to my control panel, select DNS and under ‘Records’ add a new TXT record with these values (note: – the name is just _acme-challenge – you don’t need to add the domain name suffix here):
This DNS update may take a minute or two to propogate – so you want to be sure it is available before continuirng
You can use an online tool like this one to check how it is propogating around the Internet – https://mxtoolbox.com/TXTLookup.aspx
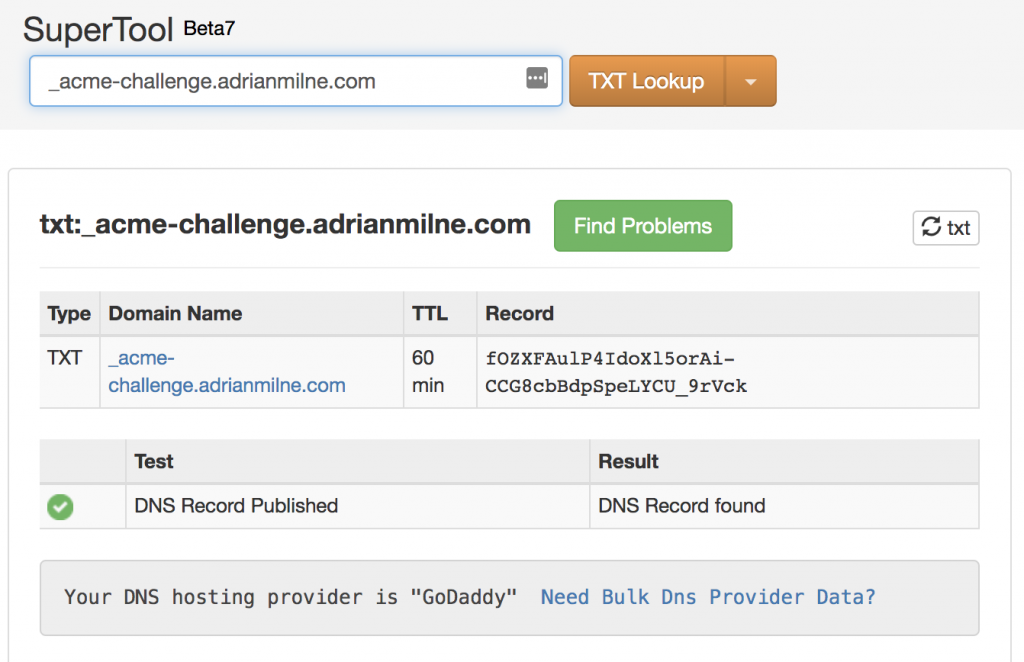
Be warned – I’ve done this a few times now on a few sites and this rarely runs totally smoothly. What you will probably find is that it takes a couple of attempts. By the time you have done the DNS change and returned to the console to click ‘Continue’ – it will probably have timed out and will immediately generate a new TXT record value. If so – just update your DNS entry with the new value and try again. It’s also worth remembering that if you are even though the tool above shows the record has updated, it might not have updated everywhere just then – so it’s worth waiting a few more seconds before clicking ‘Continue’, just to be sure or just keep refreshing until it is consistently showing the updated DNS.
If it fails and drops you out – just rerun the last command again, and repeat the process
sudo certbot -d $DOMAIN -d $WILDCARD --manual --preferred-challenges dns certonly
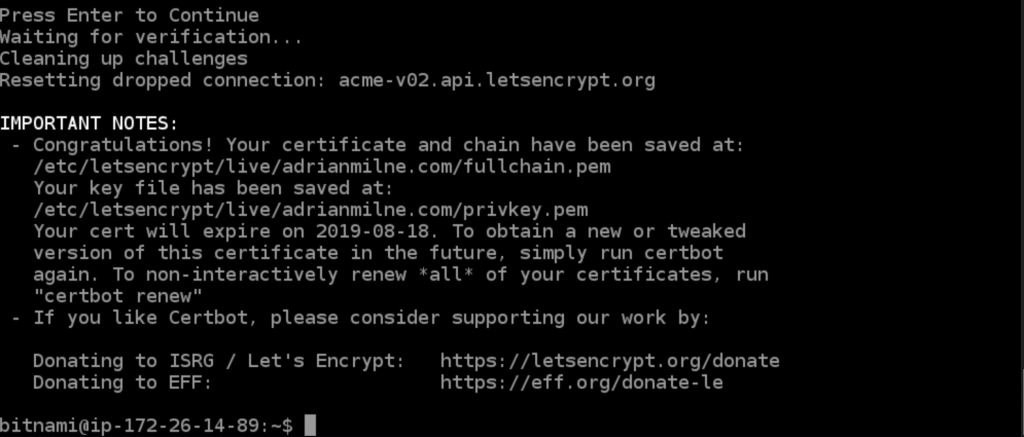
Eventually you will get the screen to confirm your certificates have been generated.
Configure Apache
Ok – next steps are to configure them in Apache and set up the necessary permissions for WordPress to use them. Again, just enter the same commands below into the terminal window (I am assuming the same terminal session here – if not you will need to reset the $DOMAIN variable).
sudo /opt/bitnami/ctlscript.sh stop
 echo $DOMAIN
 sudo mv /opt/bitnami/apache2/conf/server.crt /opt/bitnami/apache2/conf/server.crt.old
 sudo mv /opt/bitnami/apache2/conf/server.key /opt/bitnami/apache2/conf/server.key.old
 sudo mv /opt/bitnami/apache2/conf/server.csr /opt/bitnami/apache2/conf/server.csr.old
sudo ln -s /etc/letsencrypt/live/$DOMAIN/privkey.pem /opt/bitnami/apache2/conf/server.key
 sudo ln -s /etc/letsencrypt/live/$DOMAIN/fullchain.pem /opt/bitnami/apache2/conf/server.crt
 sudo /opt/bitnami/ctlscript.sh start
Configure WordPress
sudo chmod 666 /opt/bitnami/apps/wordpress/htdocs/wp-config.php
The final command just sets necessary permissions for WordPress.
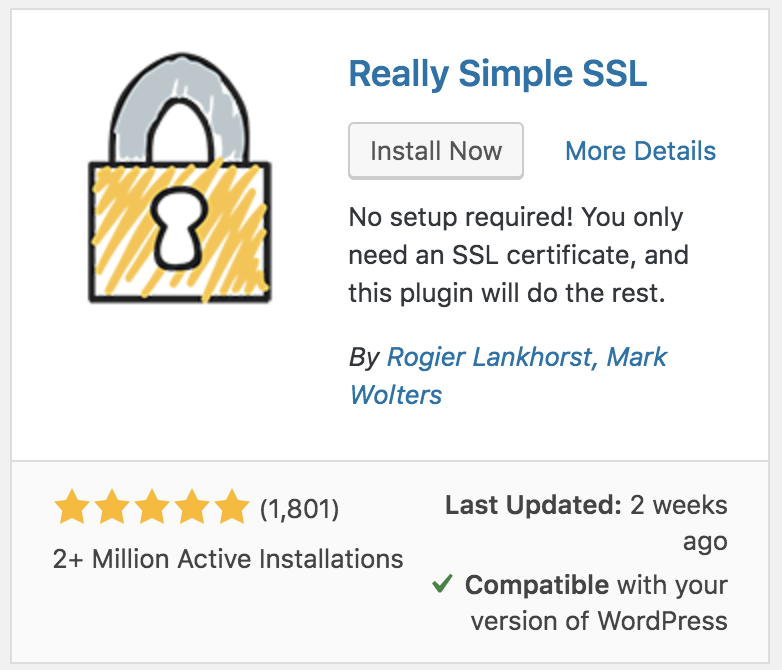
The final stage is just to install the Really Simple SSL plugin
If you check your browser connection at this stage – you can see we are still not on a secure connection yet:

After you have activated ‘Really Simple SSL’ – you will see the following notification which asks you to reload over HTTPS – click on this button.

It will then give you a button to ‘Go ahead, activate SSL’ – click that and you will be redirected to login again, but this time over a HTTPS connection

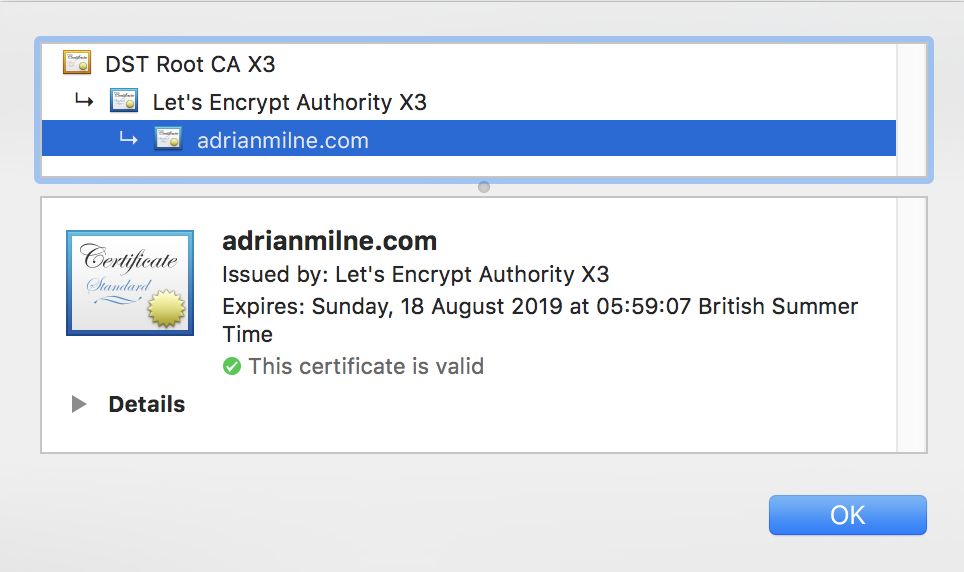
You can check your certificate details in the browser.
And that’s it – the site is now using a secure HTTPs connection, and will hopefully be looked on more favourably by Google.
Conclusion
This does add the overhead though that certificates will need to be renewed every few months. I will look into how to do this closer to the time and do a new article. Although this is a bit of a pain, the plus side is that when renewing certificates it is a good time to check all software is up to date on the Linux server (as this still has to be done manually in Lightsail – it’s not fully managed in that sense yet).